العربية
 Español
 Pусский
 lingua italiana
 Français
 Deutsch
 Portugues




Construction Site
LED Lighting in 2026
OSHA minimum illumination, glare control, and a practical guide to specifying floodlights for your next project.
A construction lighting plan must help people see tasks, routes, vehicles, signs, edges, and hazards while controlling glare and deep shadows.
In the United States, OSHA sets minimum illumination for construction activities while work is in progress. Other countries use different legal and technical frameworks. Begin with the governing requirements, divide the site into visual zones, model or test the layout, and verify the installed result with measurements.
Start with the applicable minimum.
Then design for the task.
OSHA 29 CFR 1926.56 assigns different minimum illuminance levels to different activities. The selected categories below are summarized from Table D-3. Lux values are rounded using the NIST conversion, 1 foot-candle = 10.76391 lux.
| Selected work area or activity | Minimum | Approx. lux |
|---|---|---|
| Excavation, concrete placement, active storage, access, loading, refueling & field servicing |
3 fc | 32 lx |
| General construction areas | 5 fc | 54 lx |
| Construction workshops & plants | 10 fc | 108 lx |
| First-aid rooms, infirmaries & offices | 30 fc | 323 lx |
Plan the site by visual zone
Map the site before selecting fixtures. For every zone, record the task, operating hours, surface conditions, mounting options, nearby roads or properties, and measurement plane.
Separate broad area lighting from detailed work. Note scaffolding, machines, stockpiles, and other sources of shadow.
Check approaches, crossings, changes in level, and the visibility of people from the operator’s viewpoint.
Review loading, storage, and refueling interfaces, including moving equipment and reflective surfaces.
Define local lighting and loss-of-power behavior. Keep escape routes and safety equipment recognizable.
HSE guidance calls for artificial lighting where daylight is insufficient, extra light where shadows hide hazards, and emergency provision where a lighting failure creates risk. The ILO construction code also addresses glare, disturbing shadows, and stroboscopic effects.
Design implication: an average lux value cannot describe the whole site. Pair illuminance criteria with uniformity, visibility of people and signs, glare control, spill-light limits, emergency behavior, and inspection points.
Control glare, shadows, and abrupt transitions
Night roadwork adds a second audience: motorists passing the site. FHWA guidance discusses glare from temporary work-zone floodlighting, aiming, shielding, and transitions between a bright work area and adjacent roads or sidewalks. Its nighttime-work-zone initiative also includes anti-glare lighting.
Aim toward the task
Request an aiming schedule and shielding options. Review light from approaching drivers’ and equipment operators’ viewpoints.
Use a suitable mounting height
Balance useful coverage with structural limits, wind exposure, access, and the maintenance plan.
Fill the shadowed areas
Use local task lighting where equipment blocks light, then check the work surface and access route.
Review the brightness transition
Inspect approaches at night. Check whether people, signs, edges, and moving plant remain visible across the boundary.
Translate each zone into a field check
Use this decision table to connect the evidence with the documents and site reviews needed before acceptance.
| Zone or issue | Evidence basis | Design focus | Request or verify |
|---|---|---|---|
| General work | 5 fc for the selected OSHA category | Useful, reasonably uniform coverage | Photometric plan, maintained target, meter readings |
| Access & loading | 3 fc for the listed activities | Continuous visibility around obstructions | Route plan, dark-spot review, measurement grid |
| Workshops & plants | 10 fc | Task detail and surface reflections | Task list, mounting locations, glare review |
| First aid & offices | 30 fc | Dedicated lighting for the activity | Verified local lighting or a separate circuit |
| Emergency routes | HSE / ILO risk-based guidance | Legible escape routes after power loss | Emergency-lighting plan and functional test |
| Public road interface | FHWA glare and transition guidance | Driver sightlines and light control | Night mock-up from approach directions |
Specify the evidence behind the floodlight
A useful RFQ connects each quoted model and configuration to its supporting documents. Use the checklist below when preparing your enquiry.
Require calculations or a mock-up using the proposed height, aiming, site geometry, and surface conditions. At commissioning, use a calibrated meter to measure representative minimum and average points, inspect glare and shadows, test controls, and record accepted aiming positions.
Where Alite products may fit
Alite supplies outdoor lighting for project buyers, contractors, lighting companies, and distributors. For fixed or semi-permanent site applications, the following product families are candidates for a configuration-specific review. [9]

AFL06 LED Flood Light
Evaluate for work compounds, storage areas, and fixed area lighting where floodlight optics suit the layout.
IP65 · IK08 · ADC12 aluminum
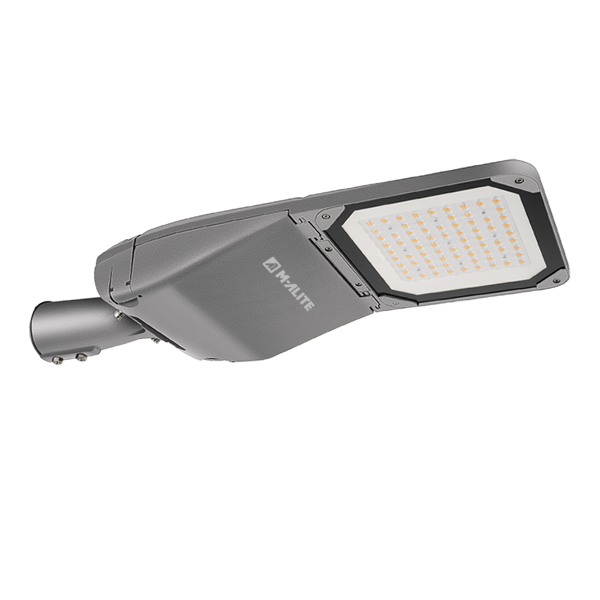
ASL23 LED Street Light
Evaluate for longer-duration access roads and perimeter routes where roadway distributions suit the site.
IP66 · IK08 / IK09 / IK10 options
These are potential application fits, not automatic approval for construction-site regulations or portable temporary-lighting use. Request the matching IES/LDT file and test documentation. Have temporary power, cabling, mounting, earthing, protection devices, and emergency supply reviewed under the local electrical code.
A five-step procurement workflow
- Define the jurisdiction and risk basisList the applicable regulations, owner criteria, road-authority rules, and emergency requirements.
- Zone the siteDocument tasks, people, vehicles, interfaces, hours, obstructions, and measurement planes.
- Design and compareEvaluate optics, mounting, aiming, glare, shadows, controls, power, and maintainability using the actual site geometry.
- Mock up and commissionInspect at night, measure agreed points, review driver and worker viewpoints, and record aiming and settings.
- Maintain and adaptClean lenses, inspect mounts and cables, replace failed parts, and repeat checks after changes to layout or tasks.
Construction site lighting FAQ
How many lux are required on a construction site?
There is no single worldwide value. For U.S. work covered by OSHA 29 CFR 1926.56, Table D-3 assigns minimums by activity. Selected categories use 3, 5, 10, or 30 foot-candles, approximately 32, 54, 108, or 323 lux. Check the full table, jurisdiction, and task before setting a project target. [1]
Can wattage determine how many floodlights are needed?
Wattage describes electrical input. Fixture quantity also depends on output and distribution, mounting height, aiming, spacing, obstructions, surface reflectance, maintenance conditions, and the measurement grid. Use the exact photometric file or a field mock-up to evaluate the layout.
Is IP65 suitable for every construction site?
An IP rating addresses defined enclosure-protection conditions. It does not establish suitability for every impact, corrosive environment, hazardous location, temporary wiring arrangement, vibration level, wind load, or mounting method. Review the full environment and the evidence for the quoted configuration.
What should be checked during a night mock-up?
Measure agreed minimum and average points. Inspect shadowed hazards, signs, controls, workers, and equipment from relevant viewpoints. Check glare for drivers, pedestrians, and operators; test dimming, switching, and emergency behavior; then record accepted positions and settings.